Quickstart
Create your first tracked asset, check who will receive its alerts, and learn how to verify delivery. You need access to your email inbox; the optional teammate step also needs a plan with an available member slot.
1. Create your account
- Go to tokentimer.ch/register and sign up with your email and a password.
- Open the verification email and confirm your address. Email-and-password sign-in requires a verified address.
- Sign in. TokenTimer creates your first workspace (a container that isolates tokens, members, and alert settings) automatically, along with a default contact group (a named list of alert recipients) pointing at your email.
2. Add your first token
A token is a record of an expiring asset: a certificate, an API key, a license, or a contract. You enter its metadata, not the secret value.
- In Asset Inventory, click Create New Token (the plus icon).
- For a harmless first example, enter Documentation expiry check, choose General, then Other.
- Set the expiration date to tomorrow. Leave Contact groups (alerts) empty to use the workspace default.
- Click Create Token. The token appears in the dashboard's Asset Inventory (the list of all your tokens) with a color-coded status pill showing time to expiry.
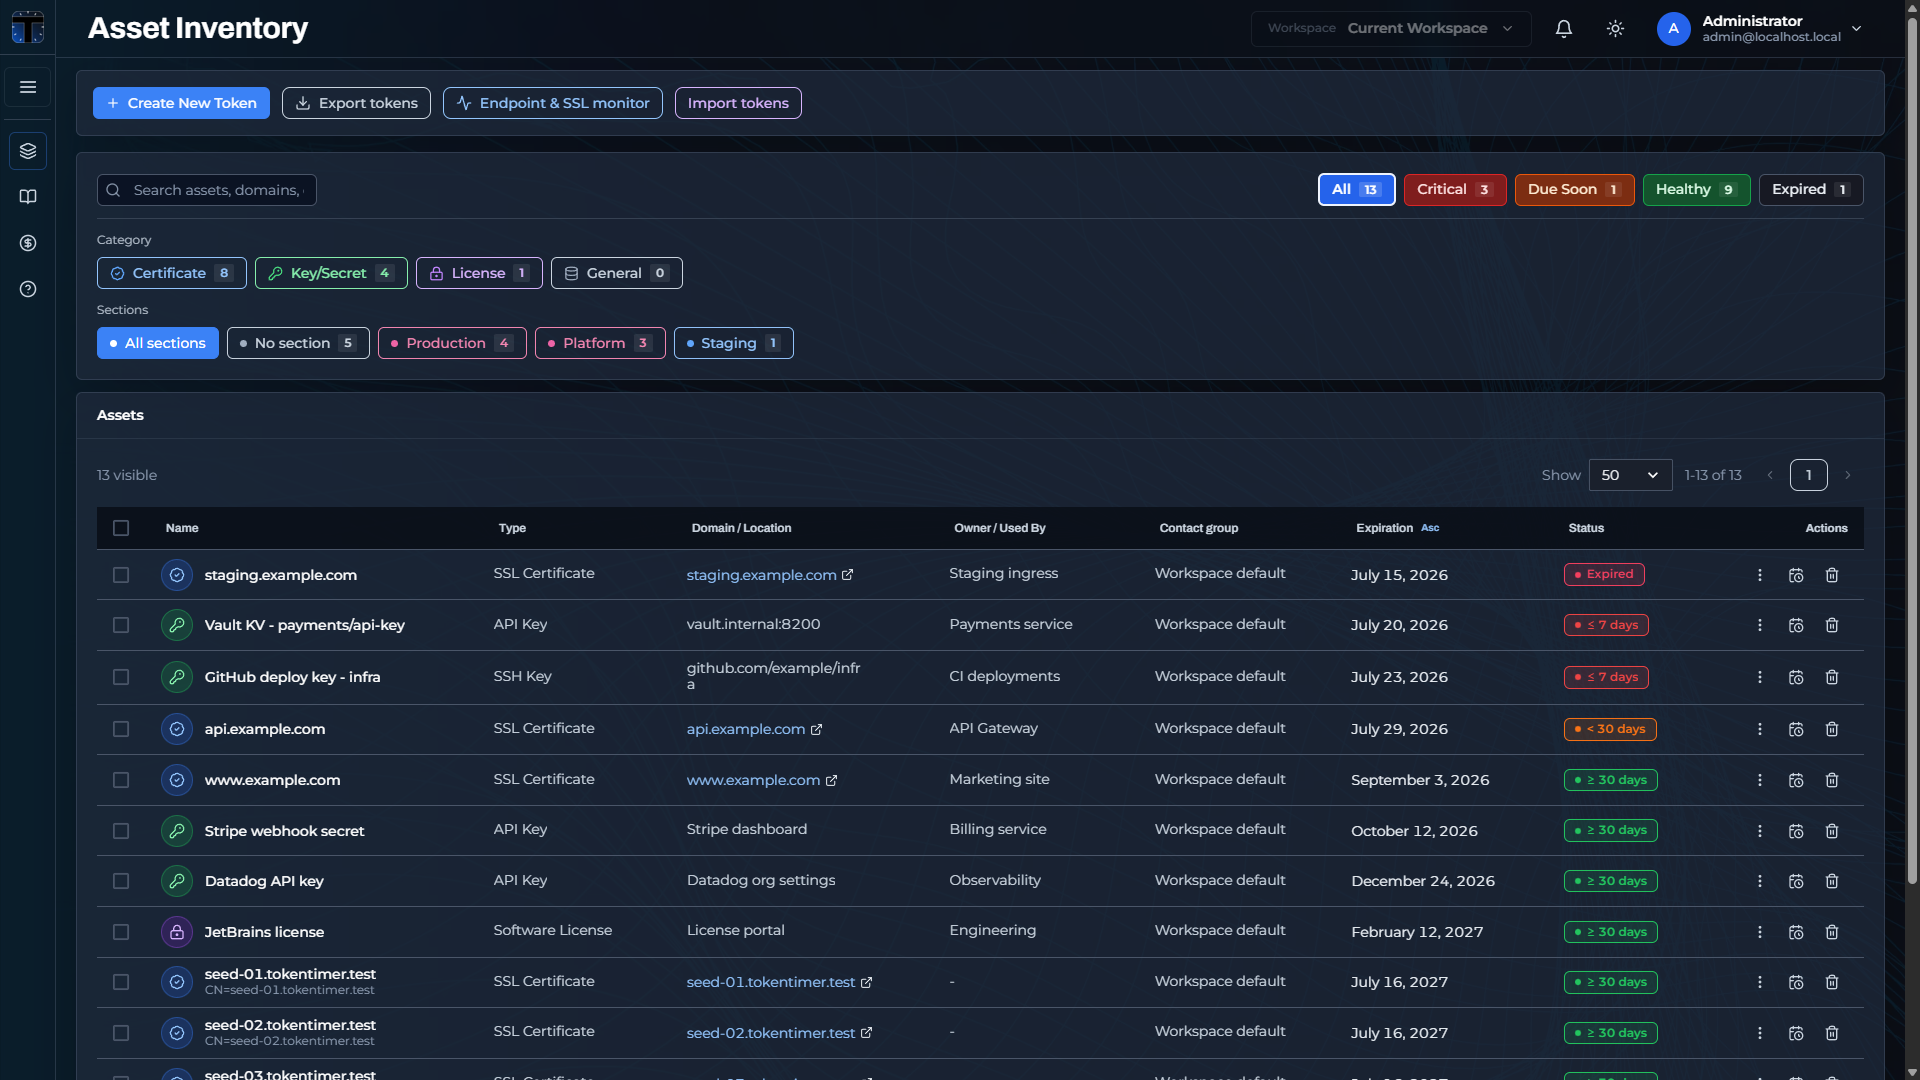 The dashboard: status filters, category filters, sections, and per-token expiration status.
Prefer bulk setup? Import from a file, connect an integration, or monitor an HTTPS endpoint to auto-create SSL certificate tokens.
3. Check your alert settings
Alerts work out of the box: the workspace has default thresholds and your email is in the default contact group.
- Open Workspace preferences. The page contains the default thresholds, delivery window, contacts, and contact groups.
- Review the threshold days (for example 30, 14, 7, 1, 0). Each token sends one notification per threshold as its expiry approaches.
- Review the delivery window (default 07:00-18:00 UTC) and set your timezone so alerts arrive during your working hours.
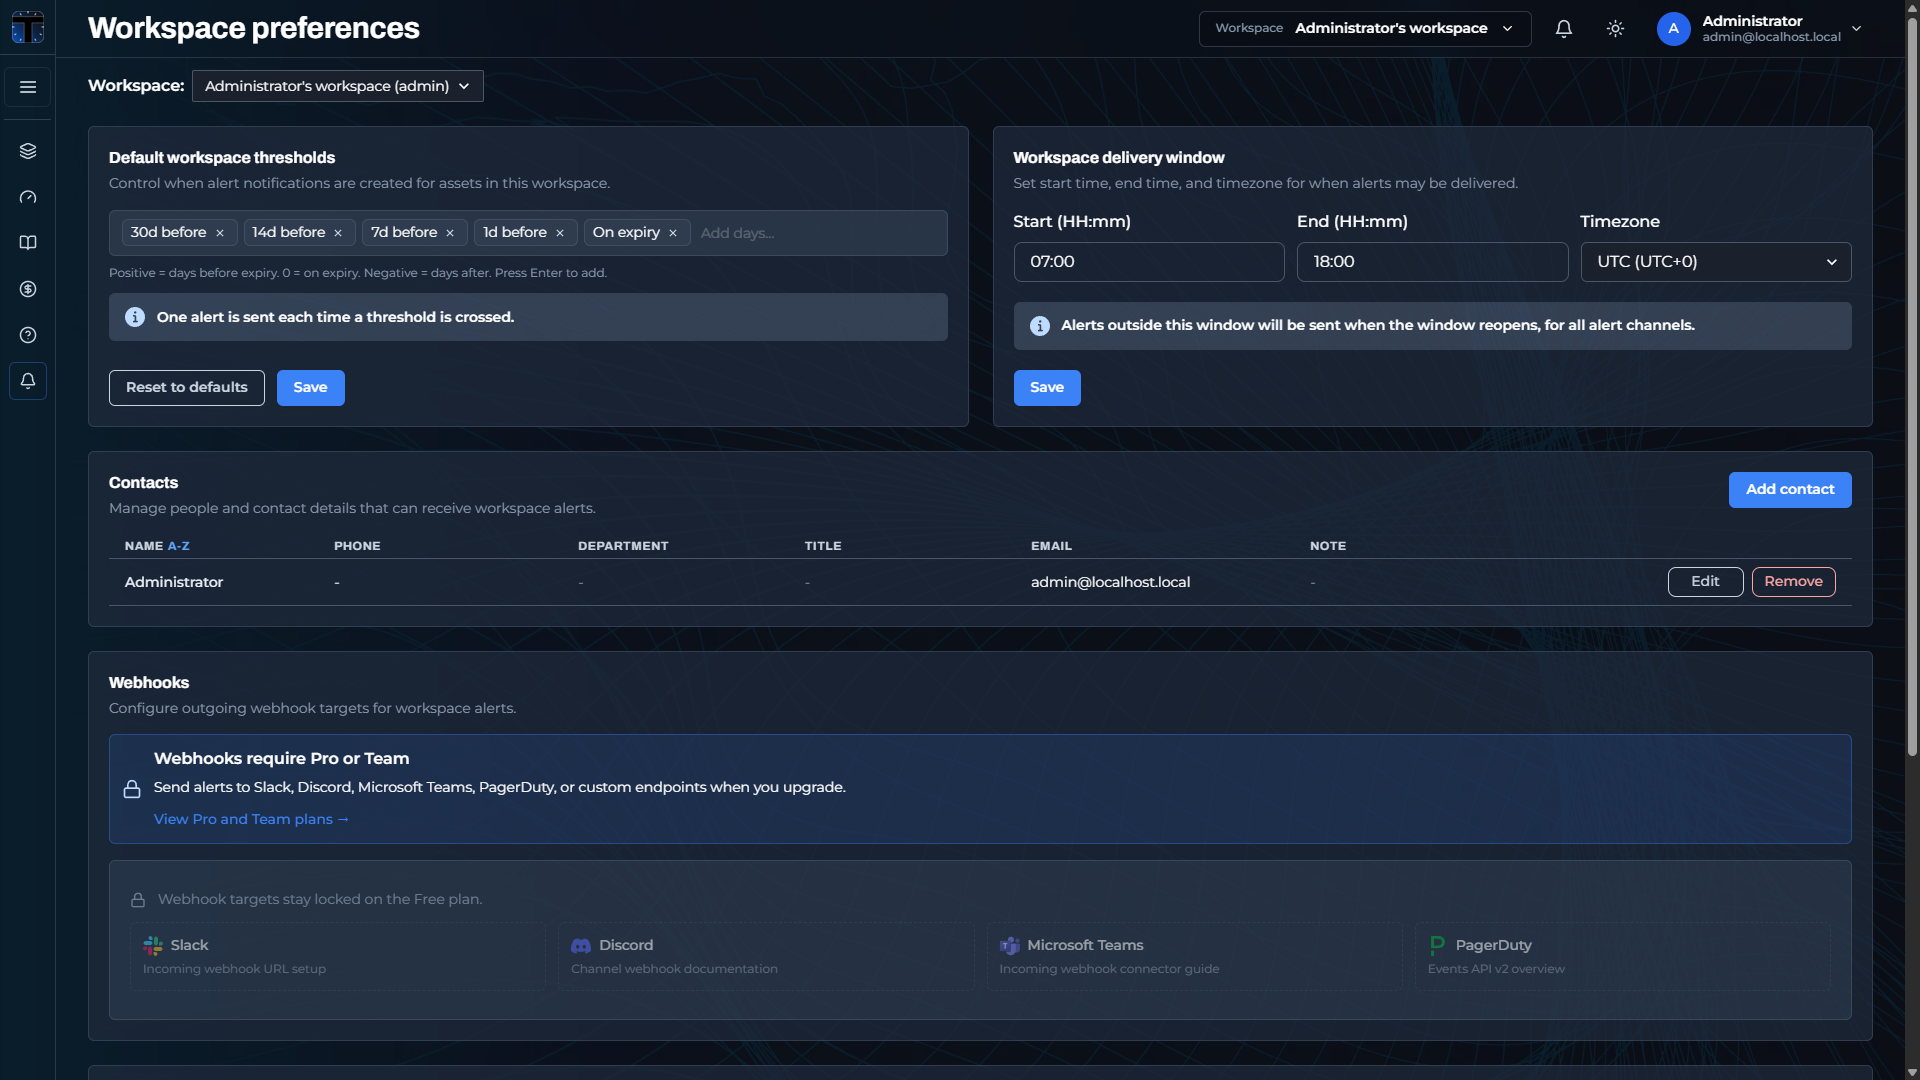 Workspace preferences: thresholds, delivery window, contacts, and webhook channels.
To deliver alerts to Slack, Teams, Discord, PagerDuty, or WhatsApp, see Contact groups & channels. The dashboard Control Center Workspace alerting panel splits eligibility (should an alert fire now) from delivery (queue, retries, limits); see Alert delivery and history.
4. Verify the first alert
Open the new asset's Details and expand Alerting and alert history. Confirm its expiry date and upcoming thresholds. In workspace alert settings, confirm that the default contact group includes your verified email and that email delivery is enabled.
Alerts are scheduled; saving an asset does not send a message immediately. When a configured threshold is reached, inspect Control Center → Workspace alerting: Eligibility explains whether an alert is due; Queue and Activity show what happens after it is queued. Delivery also depends on your delivery window and plan allowance.
Success: the asset's history records a successful delivery and the message reaches your inbox. A due status or a queue entry alone does not prove delivery. If no message arrives, follow Troubleshoot missing alerts.
5. Invite a teammate (optional)
- Open Workspaces and select your workspace.
- Enter their email, pick a role, then click Invite: Viewer (read-only) or Workspace Manager (manage tokens and preferences). The workspace creator holds the Admin role; invitations cannot grant it.
- The invitee receives an email. If they do not have an account yet, the invitation stays pending until they sign up and accept.
Member counts are capped per plan; see Plan limits. Roles are described in Teams, workspaces & RBAC.
After the check, keep the sample if it is useful or delete it to free a token slot. Use your real asset metadata for ongoing tracking.
Next steps
- Token model. Fields, categories, sections, and workspace scoping
- Integrations. Discover expiring credentials in Vault, GitHub, GitLab, AWS, Azure, and GCP
- Endpoint & SSL monitoring. Track live certificates and endpoint health
- Certificates (CertOps). Managed certificate inventory and automation
- Billing & plans. Upgrade, invoices, and plan changes
- API. Automate everything programmatically